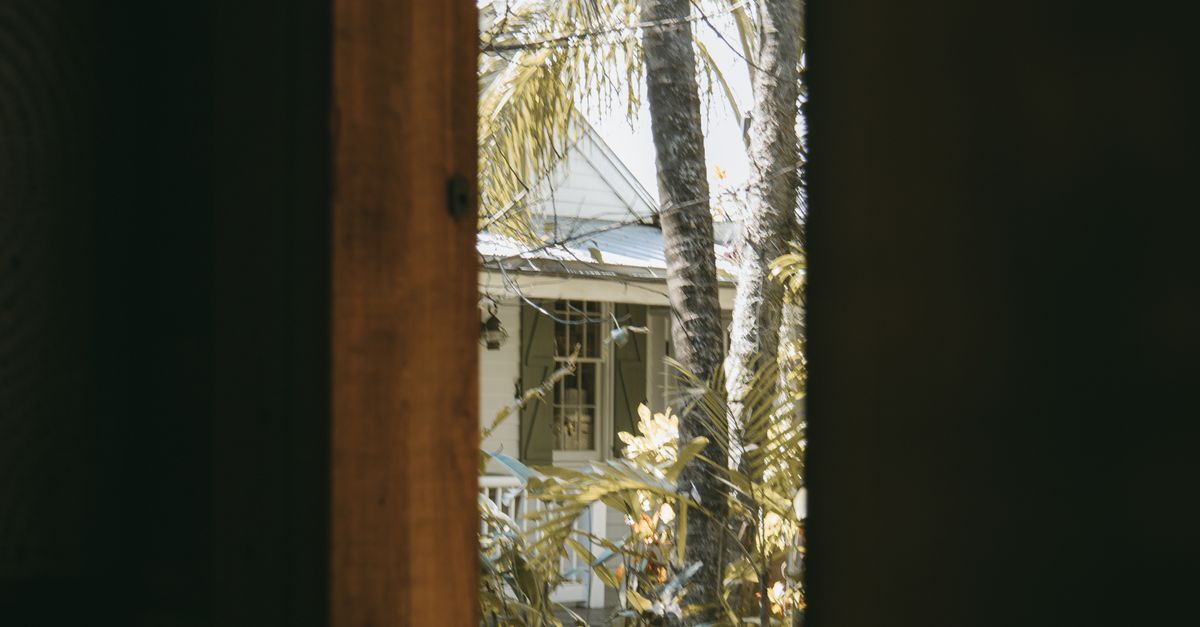
Why DIY Window Tinting Has Homeowners Divided
A window tint house diy project can seem like a straightforward way to improve your home’s comfort and privacy, but it comes with real challenges that many homeowners don’t expect. While the appeal of a weekend project is strong, the reality is that achieving a flawless, professional-looking finish is incredibly difficult. First-time installers often face a high failure rate due to issues like bubbling, creasing, and improper alignment. This type of project is best suited for patient homeowners with steady hands working on small, simple windows, but should be avoided if you have large or complex windows, or if you want guaranteed, long-lasting results.
The appeal is obvious—DIY kits promise professional results, and countless online videos make it look simple. But here’s the reality: window tint house diy projects often end in frustration. Bubbles that won’t come out. Films that peel at the edges. Uneven cuts that look amateur.
The difference between a successful DIY project and a disaster often comes down to preparation, patience, and realistic expectations about your skill level.
I’m Ian Noyes, and I’ve been installing residential window film professionally for years through North American Tint, serving homeowners throughout Northeast Florida. I’ve seen plenty of window tint house diy attempts that needed professional correction, which is why I want to give you the honest truth about what this project really involves.
Window tint house diy helpful reading:
Why Tint Your Home Windows? The Surprising Benefits
When most homeowners think about window tint house diy projects, they’re usually focused on one specific problem – maybe it’s the afternoon glare on their TV screen or those sky-high summer cooling bills. But here’s what surprises people: residential window film solves way more problems than you might expect.
The benefits go far beyond what you can see. Tinted windows look sleek and modern, but the real magic happens in ways that improve your daily comfort and protect your wallet over time.
Let me walk you through the three major benefits that make window tinting such a smart investment for your home.
Block Harmful UV Rays
Think of your windows as invisible doorways that let harmful UV rays march right into your living room every single day. Those same rays that burn your skin at the beach? They’re fading your furniture, cracking your leather sofa, and even putting your family’s skin at risk indoors.
Quality UV protection window film acts like sunscreen for your entire house. It blocks up to 99% of harmful UV rays while still letting in the natural light you love.
This protection goes way beyond keeping your curtains from fading. The Skin Cancer Foundation actually warns that UV rays can penetrate standard glass and damage your skin even when you’re sitting by a sunny window at home. Window film creates a protective barrier that keeps your family safer from these invisible threats.
Your expensive hardwood floors, artwork, and furniture will thank you too. Instead of replacing sun-damaged items every few years, window film preserves their original beauty and extends their lifespan significantly.
Boost Energy Efficiency and Savings
Here’s where window film really shines – and saves you money. Your windows are basically giant holes in your home’s insulation. During summer, they let scorching heat pour in. During winter, they let your expensive heated air escape.
Heat control window film changes this equation completely. High-performance films can reject up to 70% of solar heat , which means your air conditioner doesn’t have to work overtime to keep your home comfortable.
But the benefits work year-round. During colder months, certain films help trap warm air inside your home, reducing heating costs too. This dual-season performance means more consistent indoor temperatures and lower utility bills every month.
The energy savings from window tinting for home energy efficiency aren’t just good for your budget – they’re good for the environment. Less energy consumption means a smaller carbon footprint for your household.
Improve Daytime Privacy and Security
Nobody wants to feel like they’re living in a fishbowl, but many homeowners struggle with the choice between natural light and privacy. Home privacy window film solves this dilemma perfectly.
During daylight hours, tinted windows make it difficult for outsiders to see into your home while still allowing you to enjoy clear views from inside. You can keep your curtains open, let natural light flood your rooms, and maintain your privacy all at the same time.
Privacy film comes in different levels of opacity, so you can choose exactly how much privacy you want for each room. Bedrooms might need more privacy than living areas, and window film gives you that flexibility.
There’s also a security benefit that many people don’t consider. Quality window films add shatter resistance to your glass. If someone tries to break in or severe weather hits, the film helps hold glass fragments together instead of letting them scatter dangerously around your home. This extra layer of protection can deter break-ins and keep your family safer during emergencies.
The Ultimate Guide to Window Tint House DIY
Ready to tackle your window tint house diy project? I admire your determination! While professional installation delivers the most reliable results, I understand the satisfaction that comes from completing a home improvement project yourself.
The key to success lies in three critical elements: thorough preparation, endless patience, and obsessive attention to detail. This isn’t a weekend sprint – it’s more like a careful dance that requires precision at every step.

Think of this as your roadmap to avoiding the most common pitfalls that turn promising DIY projects into expensive do-overs.
Step 1: Prepare Your Windows and Workspace
Here’s where most window tint house diy projects succeed or fail before the film even touches the glass. Every speck of dust, every tiny piece of lint, every stubborn water spot will be permanently sealed under your film if you don’t eliminate it now.
Start with a thorough cleaning that goes beyond your typical window washing. Mix one teaspoon of tear-free baby shampoo with a gallon of bottled water in a spray bottle. This gentle solution won’t damage your film later. Avoid anything with vinegar or ammonia – these chemicals can cause the film to fail over time.
Spray your window generously and use a razor scraper to remove every trace of paint specks, adhesive residue, or stubborn grime. Work systematically from top to bottom, then squeegee the entire surface. Finish by wiping the edges and frame with a lint-free cloth until everything is completely dry.
Creating a dust-free environment is equally important. Lay down drop cloths to protect your floors and furniture from the soapy water you’ll be using. Remove curtains, blinds, and anything else that might get in your way or shed fibers. Work in good light, but avoid direct sunlight which can cause your application solution to dry too quickly.
Step 2: Measure and Cut the Film
Accuracy here prevents heartbreak later. Measure each window pane carefully, then measure again. When cutting your film, add about one inch to all sides – this extra material gives you room to work and ensures complete coverage.
Roll out your film on a large, clean, flat surface with the liner side facing up. A dining room table covered with a clean sheet works perfectly. Use a metal ruler as your guide and score the film with a sharp utility knife. Fresh blades are essential – if your knife starts dragging or tearing the film, change it immediately.
These initial cuts don’t need to be perfect since you’ll trim everything precisely once the film is in place. Focus on getting pieces that are generously sized rather than trying to cut exactly to size now.
Step 3: Apply the Film
This is the moment that separates successful DIY projects from disasters. You’ll need steady hands, plenty of your application solution, and the patience to work slowly.
Begin by liberally spraying your clean window with the soapy water mixture. You want the glass surface slippery enough that the film can slide around easily. Next comes the tricky part – removing the protective liner from your film’s adhesive side.
Try this technique: place two pieces of clear tape on opposite corners of the film, then pull them apart to separate the liner from the film. As you peel away the liner, continuously spray the exposed adhesive with your solution. This prevents the film from sticking to itself and keeps the adhesive workable.
With the liner completely removed and the adhesive side thoroughly wet, carefully position the film onto your prepared window. The soapy solution acts like a lubricant, letting you slide and adjust the film until it’s perfectly aligned. Start by positioning one top corner, then gently lay down the rest of the film.
Step 4: Squeegee and Trim
Now you need to remove all the water and air bubbles trapped under the film. First, spray the outer surface of your film with application solution so your squeegee can glide smoothly without scratching.
Starting from the top center of the window, use firm, consistent pressure to push water and bubbles toward the edges. Work in overlapping strokes, moving from the center outward and downward. Keep the film surface wet as you work – this prevents scratching and helps the squeegee glide smoothly.

Once you’ve removed most of the water and bubbles, it’s time for the final trim. Using a sharp utility knife and a straight edge, carefully trim the excess film along the window edges. Leave a small 1/16-inch gap between the film edge and the window frame – this tiny space allows for glass expansion and helps the film adhere properly over time.
Give the window one final squeegee session, paying special attention to the edges where water likes to hide. Wipe away any remaining moisture from the film and frame with a lint-free cloth.
Don’t worry if your film looks hazy or shows some small bubbles – this is completely normal. The curing process can take anywhere from a few days to several weeks as the remaining moisture evaporates. Resist the urge to touch or clean the film during this time.
Choosing the Right Film for Your Home
Walking into the window film aisle can feel overwhelming – there are so many options, each promising different benefits. The key to a successful window tint house diy project is matching the right film to your specific needs.
Are you primarily looking to slash your cooling bills? Create more privacy from nosy neighbors? Protect your favorite armchair from fading? Maybe you want it all. Understanding your main goal will guide you toward the perfect film for your home.
Think of it like shopping for sunglasses – you wouldn’t pick the same pair for driving as you would for the beach. Window films work the same way.
Types of Residential Window Film
Solar window film is your go-to choice for energy savings. These hardworking films are designed to block solar heat while reducing glare and filtering harmful UV rays. The really impressive ones use spectrally selective technology – fancy words that mean they let the light in while keeping the heat out. It’s like having smart windows that know the difference between good light and unwanted heat.
Decorative film is perfect when you want style with substance. These films come in beautiful patterns, frosted looks, or etched glass designs. They’re fantastic for bathroom windows, front door glass, or anywhere you want privacy without losing natural light. Plus, they add a custom touch that makes your home uniquely yours.
Security film takes protection seriously. These thicker, more robust films hold glass together when things go wrong – whether it’s an accidental baseball through the window, severe weather, or someone with bad intentions. They work quietly in the background, providing peace of mind without changing how your windows look.
Ceramic films represent the premium end of window film for homes. These advanced films use ceramic particles instead of metals, delivering excellent heat rejection and UV protection while maintaining crystal-clear views. They won’t interfere with your cell phone signal or GPS either – a common problem with older metallic films.
Key Factors for Your Window Tint House DIY Project
Visible Light Transmission (VLT) is probably the most important number you’ll encounter. This percentage tells you how much light passes through the film. A 70% VLT film lets in plenty of light while still providing benefits, while a 35% VLT film creates more privacy but makes rooms noticeably darker. Think about each room’s purpose – your home office needs different lighting than your bedroom.
Heat rejection ratings show how well a film blocks unwanted solar energy. Look for Total Solar Energy Rejection (TSER) numbers – higher percentages mean better heat blocking. Some premium films can reject up to 70% of solar heat while still letting in plenty of light.
UV blocking percentage should be non-negotiable. Quality films block up to 99% of harmful UV rays, protecting both your furniture and your family’s skin. This is one area where you don’t want to compromise.
Warranty information reveals a lot about film quality. Reputable manufacturers offer warranties of 10 years or more, covering issues like bubbling, cracking, and fading. Here’s something many DIYers don’t realize – some premium films require professional installation to maintain warranty coverage. Always read the fine print before you start cutting.
Local regulations and HOA rules might seem like a buzzkill, but they’re worth checking. While residential restrictions are rare, some communities have rules about reflective films or darkness levels, especially on street-facing windows. A quick call to your HOA can save you from having to redo your hard work later.
The bottom line? Take time to match your film choice to your specific needs and skill level. The most expensive film isn’t always the best choice for a DIY project, and the cheapest option rarely delivers the results you’re hoping for.
DIY vs. Professional Installation: A Realistic Comparison
Let’s be honest about what you’re really getting into with a window tint house diy project. While the appeal of saving money is strong, the reality often doesn’t match the expectations.
I’ve been installing residential window film for years, and I’ve seen plenty of well-intentioned homeowners who started with enthusiasm and ended up calling us to fix what went wrong. That doesn’t mean DIY is impossible, but it’s important to understand what you’re up against.
The truth is, DIY installation quality varies wildly . Some handy homeowners achieve decent results on smaller windows, but most struggle with bubbles, creases, and uneven cuts that scream “amateur job.” Meanwhile, professional installation delivers a flawless, smooth finish with expert alignment and precise trimming every time.
Time commitment is another reality check. What looks like a quick weekend project often stretches into multiple frustrating days, especially for first-timers. Professional installation, on the other hand, is efficient and quick – we often complete entire homes in a single afternoon.
When it comes to tools and materials , DIY kits from home improvement stores offer basic films with limited performance options. Professionals have access to specialized tools and high-performance films that simply aren’t available to consumers. These advanced films often provide superior heat rejection, UV protection, and durability.
Durability is where the differences really show over time. DIY installations may peel or degrade prematurely due to improper application techniques. Professional installations maintain their performance and appearance for years, with films that retain their effectiveness throughout their lifespan.
Warranty coverage tells the whole story. Most quality films offer limited warranties for self-installation, and some premium films void their warranties entirely if not professionally installed. Professional installation comes with comprehensive warranties on both the film and labor, often lasting 10 years or more.
Potential Pitfalls of Window Tint House DIY
Having seen countless window tint house diy attempts that needed professional correction, I can tell you the most common problems that turn exciting projects into expensive mistakes.
Bubbles and creases top the list. These happen when air or water gets trapped under the film, or when improper squeegeeing leaves pockets behind. Creases often occur when the film folds or sticks to itself during application – and once they’re there, they’re permanent.
Peeling edges develop when windows aren’t perfectly clean or when the film isn’t trimmed with the correct gap. Even microscopic debris can cause lifting that spreads over time, ruining the entire installation.
Dust and hair contamination creates visible imperfections that can’t be fixed. Even a single pet hair or speck of dust trapped under the film will show. Achieving the dust-free environment needed for perfect installation is nearly impossible outside a controlled professional setting.
Film damage during installation is heartbreakingly common. Using dull blades, applying too much pressure, or improper handling can scratch or tear the film, wasting your investment and forcing you to start over.
Here’s something many homeowners don’t consider: applying aftermarket film can void your window warranties . This is especially critical with double-pane units, where certain films can cause thermal stress leading to seal failure or glass breakage. Always check your window manufacturer’s warranty before attempting any DIY installation.
The Professional Advantage
For homeowners who want guaranteed results that improve their home’s value and comfort, professional installation is simply the superior choice. Our team at North American Tint brings years of experience and specialized knowledge to every residential project.
We use only high-quality, professional-grade films designed for optimal performance and longevity. These films aren’t available in DIY kits and come with comprehensive manufacturer warranties that are only valid when installed by certified professionals.
Our specialized tools and techniques ensure perfect, bubble-free application every time. We understand the nuances of different window types, including double-pane and Low-E glass, and can recommend compatible films that won’t void your existing warranties.
Experience with all window types means we know how to handle challenging installations like large sliding doors, unusual shapes, or windows with existing Low-E coatings. We work efficiently and precisely, completing projects in a fraction of the time it might take a DIY enthusiast.
Most importantly, our installation warranty gives you complete peace of mind. Your investment is protected, and if any issues arise, we’ll make them right. For homeowners seeking a lasting, high-quality improvement to their home’s comfort, privacy, and energy efficiency, professional installation is an investment that truly pays off.
Frequently Asked Questions about Home Window Tinting
Homeowners considering window tint house diy projects often have similar questions. Let me address the most common concerns I hear from families throughout our service area.
How do I clean tinted windows?
Cleaning tinted windows is actually simpler than most people think, but timing matters. Wait until your window film has fully cured – this takes anywhere from 30 to 60 days depending on your climate and the film type.
Once cured, stick to gentle cleaning methods. Use a soft, non-abrasive cloth or clean sponge with a mild, ammonia-free cleaning solution. That same baby shampoo and water mixture from your window tint house diy application works perfectly for ongoing maintenance too.
Avoid harsh chemicals and abrasive materials like stiff brushes or paper towels. Ammonia-based cleaners are particularly damaging – they’ll break down the film’s adhesive over time, causing peeling and bubbles. A gentle wipe followed by drying with a clean, soft cloth is all you need to keep your tinted windows looking pristine.
Will window film make my rooms too dark?
This concern comes up constantly, and I understand why. Old-school window films from decades past did create cave-like interiors , but modern technology has completely changed the game.
Today’s spectrally selective and ceramic films are engineering marvels. They can block up to 70% of heat and 99% of UV rays while allowing most visible light to pass through. It’s like having smart sunglasses for your home – they filter out what you don’t want while preserving what you do.
You control the light levels through Visible Light Transmission (VLT) options. Want maximum heat protection with minimal light reduction? Choose a high VLT film that’s virtually clear. Need privacy and glare control? Opt for a lower VLT. Modern films give you targeted benefits without sacrificing the bright, welcoming atmosphere you love about your home.
Can I apply film to any type of window?
Here’s where window tint house diy projects can get tricky. Most standard single-pane windows handle film beautifully , but modern homes often have more complex glass systems.
Double-pane windows and Low-E coated glass require careful consideration . The wrong film choice can create thermal stress – essentially, the glass expands and contracts unevenly, potentially causing cracks or seal failures between panes. This isn’t just cosmetic damage; it can void your window warranties entirely.
Professional assessment becomes invaluable for these situations. We evaluate your specific window types, age, and existing coatings to recommend compatible films. What might seem like a straightforward window tint house diy project could actually require specialized knowledge to avoid costly mistakes.
The peace of mind that comes with professional consultation often outweighs the initial DIY appeal, especially when you’re protecting both your film investment and your existing windows.
Is a DIY Project Right for You?
The truth about window tint house diy projects is that they work best for homeowners who have realistic expectations and the right temperament for detail work. If you enjoy weekend projects, have steady hands, and don’t mind potentially redoing sections that don’t turn out perfectly, a DIY approach might appeal to you.
But let’s be honest about what success looks like. Even experienced DIYers often end up with minor imperfections – a small bubble here, a slightly uneven edge there. These might not bother you, especially on less visible windows or in rooms where perfection isn’t critical.
However, if you want results that truly improve your home’s value and provide maximum energy efficiency benefits, professional installation makes the difference. The advanced films we use at North American Tint simply aren’t available in DIY kits. These professional-grade coatings offer superior heat rejection, UV protection, and durability that lasts for decades, not just years.
Our expert installation process ensures every window gets the attention it deserves. We understand how different window types behave, which films work best for your specific needs, and how to achieve that flawless finish that makes your neighbors wonder if you upgraded to new windows entirely.
Professional installation also protects your investment. Our comprehensive warranties cover both the film and the installation work, giving you peace of mind that your window tinting will perform as promised for years to come.
From our St. Augustine office, we serve homeowners in surrounding areas like Jacksonville and Palm Coast, and our team brings years of experience to every project. We’ve perfected techniques that ensure optimal performance from every square foot of film we install.
Ready to transform your home with professional residential window film? Contact us for a professional consultation and find what properly installed window tinting can do for your home’s comfort and efficiency.